How to start Django application from scratch on HostPresto!
In this tutorial we will create a brand new Django application on HostPresto!
Let’s start to set up our HostPresto! Environment.
Creating subdomain
Suppose you have a domain registered with HostPresto! - yourname.xyz (BTW .xyz domains are the cheapest :). For this tutorial, we will create a subdomain start.youname.xyz We think this is the most natural and straightforward method. Setting up the tutorial project in the root domain may pollute your space. You may also have some website sitting there already. Adding a subdirectory like www.youname.xyz/start is less convenient, in our opinion.
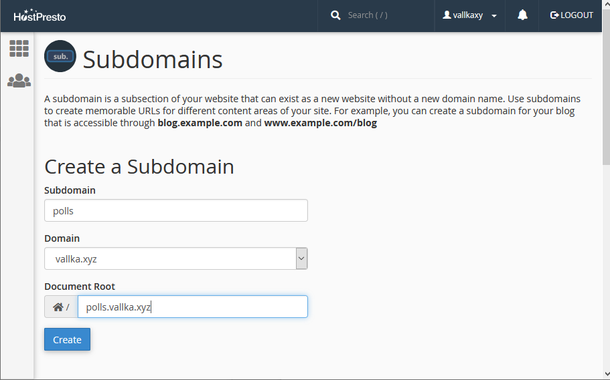
Log in into cPanel and click on Subdomains in DOMAINS section. Enter ‘start’ into Subdomain field. Select your main domain (youname.xyz) from Domain dropdown. Document Root will be auto-populated with ‘start.yourname.xyz’. Let’s accept the default value. Click Create.
Subdomain created. If you point your browser to http://start.yourname.xyz, most probably you will see a directory listing – something like this:
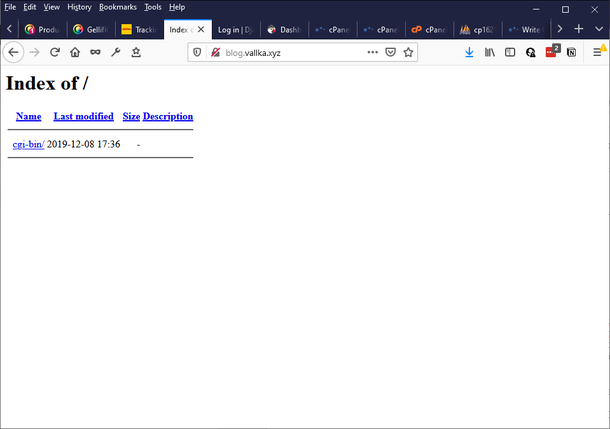
This is how an empty website looks like on HostPresto!
Setting up a Python application
In cPanel go to the SOFTWARE section and select Setup Python App. Click on CREATE APPLICATION.
HostPresto! Uses software from Passenger (https://www.phusionpassenger.com/) to set up Python applications. The setup page isn’t very intuitive, in my opinion. But let’s use it anyway.
Select the latest Python version in the first field. It is 3.7.3 at the moment of writing. In Application root type in the directory name we have created in the previous step, relating to your home directory – that is, just ‘start.yourname.xyz’. Select ‘start.yourname.xyz’ as Application URL in the next line. Leave Application startup file and Application Entry point empty – the system will create this file by its own rules and let it do it. The last thing – it is sensible to name a log file (Passenger log file) – enter /home/yourname/start.log

Click on CREATE
Click in START APP
Again, point your browser to http://start.yourname.xyz (or refresh the page if you still have it in one of the tabs). Now it should show something like this:
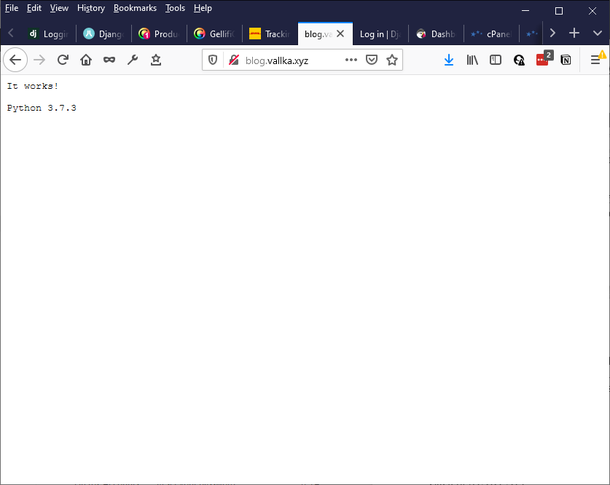
This means we have successfully created a virtual environment for our Python application.
Installing Python packages
Once we have a virtual environment, we have to install needed packages. How to do this, is not particularly clear from cPanel web interface. Yes, we can do it directly in web interface (we need to type ‘requirements.txt’ - if we have this file in root subdirectory – in ‘Configuration files’ section, click ADD, then click ‘Run Pip install'), but we won’t do it this way. Let’s do it in traditional way, running shell command. We will need to use shell commands anyway, so let’s go to command line straight away.
We need to make an ssh connection to our server. If you are on Windows, I recommend using PuTTY program. Use your cPanel username and password (not client area password!) and change port 22 to 88 – HostPresto uses port 88 for ssh connection.
Once logged in, activate your project virtual environment and cd into the project directory. How to do this? Actually cPanel contains a useful hint: at the top of the page the command is displayed:
Enter to the virtual environment. To enter to virtual environment, run the command: source /home/yournamexy/virtualenv/start.yourname.xyz/3.7/bin/activate && cd /home/yournamexy/start.yourname.xyz
Just click on command and it will be copied to the clipboard.
Paste the command to PuTTY terminal window and run it – now you are in your project directory and virtual environment is activated. First of all, let’s upgrade pip – run the command
pip install --upgrade pip
Next, we will install Django:
pip install django
We might need mysqlclient, so let's install it:
pip install mysqlclient
I highly recommend to install WhiteNoise for managing static files, this will make life much easier:
pip install whitenoise
To finalize set up, let's create requirements.txt:
pip freeze > requirements.txt
This command will create requirements.txt file, which can be used to re-create the environment if needed. We don't need this file right now right here, but it's a good practice to have it at hand.
Creating a project
Run the following command:
django-admin startproject start .
(Please notice the dot at the end of command. This dot tells django-admin to create a project in the current directory. Otherwise, it will create a subdirectory 'start' in the current directory - this is not what we want.)
Now let's try to create an app:
python manage.py startapp startapp
Most probably, you will get a long list of errors. The very last line contains the actual error, something like this:
django.core.exceptions.ImproperlyConfigured: SQLite 3.8.3 or later is required (found 3.7.17).
Actually, this is good that we run into this error in the very first step. (If not and your command completed successfully you still need to read further!). As you may remember, for local development you may SQlite server, built-in Python SQL server. This is completely fine for local development, but totally unacceptable for a production server (and we are pretending to create a production server now). So luckily for us, Django doesn’t like the version of the installed SQlite server, so there is no other way than to switch to MySQL. (Traditionally Django uses PostgreSQL but in our case we have MySQL pre-installed, so we will use MySQL)
So let’s return to cPanel and create a MySQL database, using available tools.
Creating MySQL database for the project
This is easy. In cPanel, go to DATABASES – MySQL Database Wizard. Type in a name for a database. Let’s call it 'start' in order to be consistent. cPanel automatically prefixes the database name with yournamexy_, so the full name will be 'yournamexy_start'. Click on Next Step, provide a name and a password for a new database user (let’s give the user the same name: 'yournamexy_start'). Provide a password. Click Next. On Step 3 check ALL PRIVILEGES. Click Next.
Don’t forget the newly created password – we’ll need it in a minute.
Configuring Django to use MySQL
In file manager, navigate to /home/yournamexy/start.yourname.xyz/start. This subdirectory should contain settings.py file. Open this file in editor and find DATABASES section. Replace the whole section with the following lines:
DATABASES = {
    'default': {
        'ENGINE': 'django.db.backends.mysql',
        'NAME': 'yournamexy_start',
        'USER': 'yournamexy_start',
        'PASSWORD': os.environ['START_DB_PASSWORD'],
        'HOST': 'localhost',
    }
}
(Replace yournamexy_start with your own name yor have created in the previous step)
It’s not a good idea to hardcode the database password, so we will read it from environment variable.
So, return to the console and set a variable for a password:
export START_DB_PASSWORD=[your password]
(Use a password you have chosen when creating a database)
Now you should be able to create an application. Run again:
python manage.py startapp startapp
(Now I realized that I have chosen a bad name for my app - 'startapp'. startapp is also a command in manage.py, so it is unclear what is what in the above command. Much better would be to name the app, say, 'first_app', and the command to create such app will be: 'python manage.py startapp first_app')
Configuring passenger_wsgi.py
Return to cPanel – Setting Python App page.
You will see that Application startup file and Application Entry point fields are populated now.
Application startup file is called passenger_wsgi.py. Find this file in the root folder of our project. Open it in File Manager. It should look like this:
import os
import sys

sys.path.insert(0, os.path.dirname(__file__))

def application(environ, start_response):
    start_response('200 OK', [('Content-Type', 'text/plain')])
    message = 'It works!\n'
    version = 'Python %s\n' % sys.version.split()[0]
    response = '\n'.join([message, version])
    return [response.encode()]
We don’t need all this. So delete the content and replace it with the following:
import os
from django.core.wsgi import get_wsgi_application

os.environ.setdefault('DJANGO_SETTINGS_MODULE', 'start.settings')
application = get_wsgi_application()
Last thing we need to do before attempting to run our new Django site is to set environment variable for db password in Python web application. We did it in a command shell, but we need to do the same for the webserver.
For this, return to SOFTWARE section in cPanel, go to Setup Python Applicaiton, click on Edit (pencil) icon in a line with our newly created application start.yourname.xyz. In Environment variables section add a variable named START_DB_PASSWORD with your db password. Click SAVE at the top of the page. Click RESTART.
Now we are ready to try. Point your browser to http://start.yourname.xyz and refresh the page. Most probably you will see:
DisallowedHost at /

Invalid HTTP_HOST header: 'start.yourname.xyz'. You may need to add 'start.yourname.xyz' to ALLOWED_HOSTS.
Thankfully, the message is very clear. ALLOWED_HOSTS = [] in settings.py. This default value only allows us to run a web app on the localhost. Now we need to change this. Open settings.py file and find the line:
ALLOWED_HOSTS = []
Reolace it with the following:
ALLOWED_HOSTS = ['polls.yourname.xyz']
(Replace 'yourname.xyz' with your actual subdomain)
RESTART application again
Refresh http://start.yourname.xyz page:
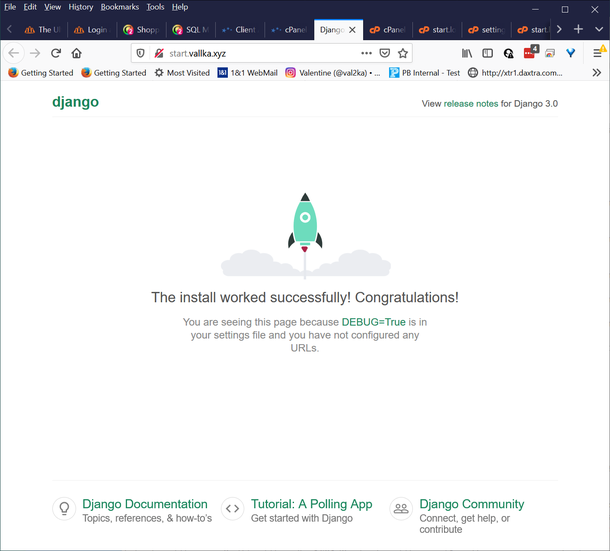
Congratulations! Our first Django application is up and running!
Further steps
Ok, let's not stop on this. Let's go forward. Let's try admin page: http://start.yourname.xyz
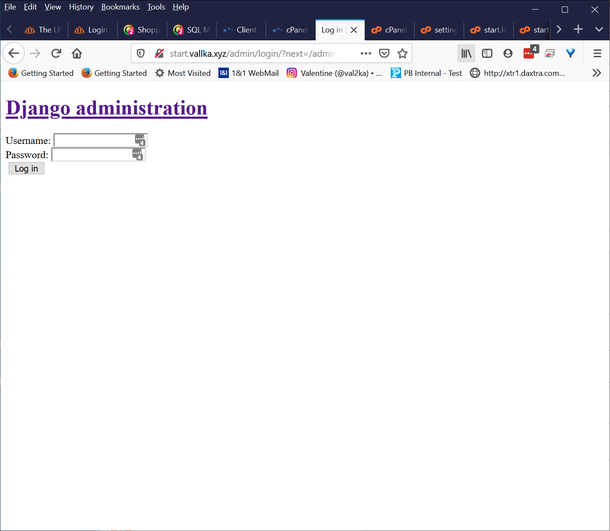
It looks like our web application doesn't see .css files. Yes, this is the problem. Luckily, we already installed WhiteNoise package, which will help us with just one line in settings.py. Open settings.py in editor and add one line to MIDDLEWARE section:
MIDDLEWARE = [
    'django.middleware.security.SecurityMiddleware',
    'whitenoise.middleware.WhiteNoiseMiddleware',            #new
    'django.contrib.sessions.middleware.SessionMiddleware',
    'django.middleware.common.CommonMiddleware',
    'django.middleware.csrf.CsrfViewMiddleware',
    'django.contrib.auth.middleware.AuthenticationMiddleware',
    'django.contrib.messages.middleware.MessageMiddleware',
    'django.middleware.clickjacking.XFrameOptionsMiddleware',
]
RESTART the app. Refresh the page:
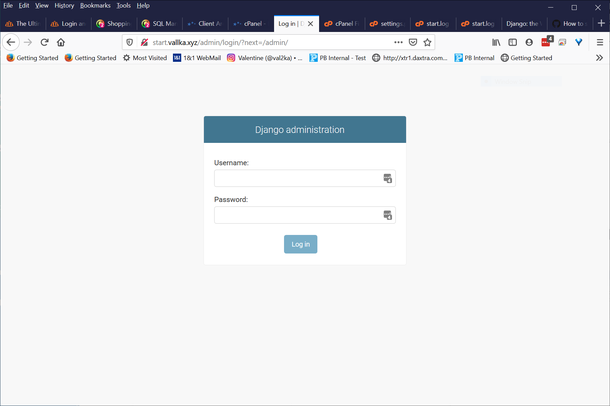
Much better!
This is what WhiteNoise does for us - no need to run collectstatic command. All static files are being served directly from Python server.
Next thing we need to migrate the database. We didn't write a single line of code yet, but Django did a lot for us. So let's migrate:
python manage.py migrate
Let's create a superuser:
python manage.py createsuperuser
Now you can log in to admin page.
Creating some meaningfull app
Ok, let's create something meaningfull. Let it be a simple Contact list.
First of all, we need to create a model. Let's open a nearly empty file startapp/models.py and add some content. A very simple Contact model:
startapp/models.py
from django.db import models

# Create your models here.
class Contact(models.Model):
    forename = models.CharField(max_length=100)
    surname = models.CharField(max_length=100)
    email = models.EmailField(max_length=100)

    def __str__(self):
        return f"{self.forename} {self.surname}: {self.email}"
We need to update settings.py one more time. We need to add our app, startapp, to INSTALLED_APP
start/settings.py
...
INSTALLED_APPS = [
    'django.contrib.admin',
    'django.contrib.auth',
    'django.contrib.contenttypes',
    'django.contrib.sessions',
    'django.contrib.messages',
    'django.contrib.staticfiles',

    'startapp',   #new
]
...
Let's add our new model to admin part. Add these lines to startapp/admin.py
startapp/admin.py
from django.contrib import admin

# Register your models here.
from .models import Contact
admin.site.register(Contact)
In the console, run following commands:
python manage.py makemigrations
python manage.py migrate
RESTART the app and login to admin interface, using credentials you supplied to createsuperuser command

In this tutorial, I won't go further into creating views, forms and other common stuff. All this is common to any hosting provider, so you may find tons of useful tutorials on the Internet. Instead, I'd like to pay some attention to details, specific for HostPresto. Namely, testing.
Testing our app
Let's create a very simple test in startapp/tests.py
startapp/tests.py
from django.test import TestCase

# Create your tests here.
from .models import Contact

class ContactModelTests(TestCase):
    def test_contact_save(self):
        contact = Contact()
        contact.save()

        self.assertNotEqual(contact.id, None,'id is autocreated')
        self.assertEqual(len(Contact.objects.all()),1,'Exactly 1 record in db after save')
If we try to run test the usual way:
python manage.py test
Most likely, we will get an error, something like this:
Got an error creating the test database:
(1044, "Access denied for user 'yournamexy_start'@'localhost' to database 'test_yournamexy_start'")
This is because Django tries to create a new database for testing, and our database user does not have enough rights to create another database on MySQL server. Ok, we can create an empty database in cPanel MySQL Databases and use the parameter --keepdb, but there is another problem: cPanel requires that database name starts with 'yournamexy_'. We cannot prepend 'test_' to the name.
Ok, there are still possibilities. Let's create a database with the name 'yournamexy_start_test'. This is allowed. How should we tell Django to use this name? We need to edit startapp/settings.py one more time and add an option to DATABASES section:
DATABASES = {
    'default': {
        'ENGINE': 'django.db.backends.mysql',
        'NAME': 'yournamexy_start',
        'USER': 'yournamexy_start',
        'PASSWORD': os.environ['START_DB_PASSWORD'],
        'HOST': 'localhost',

        'TEST': {
            'NAME': 'yournamexy_start_test',
        }
    }
}
Now we can run tests with the following command:
python manage.py test --keepdb
(Don't even think of using the live db for testing - running tests on live will empty all data!)
Logging
Setting up logging in Django is really complicated. I don't want to go in detail here. But what can we do with the default configuration? Actually, it just works, although to use it is not very convenient. To demonstrate logging, let's add some logging to our model:
startapp/models.py
from django.db import models
import logging
logger = logging.getLogger(__name__)

# Create your models here.
class Contact(models.Model):
    forename = models.CharField(max_length=100)
    surname = models.CharField(max_length=100)
    email = models.EmailField(max_length=100)

    def __str__(self):
        return f"{self.forename} {self.surname}: {self.email}"

def save(self, *args, **kwargs):
    super().save(*args, **kwargs)  # Call the "real" save() method.
    logger.error( f"Contact saved with id={self.id}.")
The default logging level is set to ERROR (despite whatever is written in Django documentation - probably Passenger or cPanel somehow interfere with it), so don't bother to use logger.debug of logger.info.
Now go to admin interface and create a few Contacts to see how it works.
Where can we see the logs?
Remember, there was a Passenger log file, which name we set up in SOFTWARE - Python Applications panel? (we called it /home/yourname/start.log). All server logs from our Python application go into this file, and logs generated by calling logger.error or logger.critical also go into this file. Not very convenient, but at least we can use the default Python logging mechanism.
Another useful option would be to install Django Debug Toolbar, although it still requires some configuration for optimal use.
Conclusion
In this tutorial, we have created a very basic Django application. This application does very little, and even does not have a proper front end, all it has is an admin part. But we discussed very important details, related to specifics of HostPresto! How to set up a Python environment, how to switch to MySQL database, how to set up passenger_wsgi.py file, how to use logging with minimum configuration effort and even how to test our application.
Probably, using a remote server as a development server is not a very good idea. It would be better to install Python and all development tools locally and only use the remote server as a test or production environment.
All files for this tutorial can be found here:
https://github.com/vallka/django-start
HostPresto! is reasonably priced and reliable hosting. What makes it outstanding — like many hosting providers they give you PHP and MySQL out of the box, but unlike most of other providers, they give you a very simple solution to host almost any kind of application, Node.js, Django, Flask, Ruby-on-Rails to mention a few. And all this zoo of applications can co-exist on the same server! What makes HostPresto! a great choice for any developer.
HostPresto are one of the leading independent, affordable website hosts.
hostpresto.com